What You're Buying
A Virtual Private Server (VPS) is a computer in a data center that runs 24/7. Your OpenClaw will live here, always on, always reachable. Think of it as renting a small computer that never sleeps.
Why Vultr
- Reliable, well-established provider
- Simple dashboard — no AWS-level complexity
- Hourly billing — you only pay for what you use
- Good selection of data center locations
- Straightforward pricing with no hidden fees
The Plan You Want
Cloud Compute — Shared CPU (look for plans labeled vhp):

- 2 vCPU (virtual processors)
- 4 GB RAM (memory)
- 100 GB NVMe (storage)
- 5 TB/month bandwidth (data transferred in and out — more than enough for OpenClaw)
- $24/month ($0.036/hr)
This is the sweet spot for OpenClaw. You want this plan or better — it handles the AI assistant, browser automation skills, and multiple messaging channels without breaking a sweat.
What to Do
- Go to vultr.com and create an account
- Use your Proton Mail address
- Use the Privacy.com card named "Vultr VPS"
- Set the Privacy.com spending limit to $40/month (covers VPS + backups with a small buffer)
- Save this login in Bitwarden "OpenClaw" folder
- Navigate to Products → Compute → Deploy Server
- Choose:
- Type: Cloud Compute — Shared CPU
- Location: Pick the data center closest to you geographically (lower latency)
- Plan: Select
vhp-2c-4gb(2 vCPU / 4 GB / 100 GB NVMe / $24/mo) or better
- Click Configure Software
- Before filling in the next page, set up an SSH key:
- On your local computer, open a terminal — Mac/Linux: open Terminal. Windows: open PowerShell
- Run:
ssh-keygen -t ed25519 -C "openclaw-vps" - Press Enter for the default location. Set a passphrase if you want extra security
- Display your public key:
- Mac/Linux:
cat ~/.ssh/id_ed25519.pub - Windows PowerShell:
type $env:USERPROFILE\.ssh\id_ed25519.pub
- Mac/Linux:
- Copy the output
- Back in the Vultr deploy page, click Add New next to SSH Keys
- Paste your public key, give it a name like "My Laptop", and save
- Select this key on the deploy page
- Fill in the remaining fields on the Configure Software page:
- Bootable Block Volume: leave this alone (no block volume needed)
- SSH Keys: select the key you just added
- Firewall Group: leave as "No Firewall Group" (we'll configure a firewall on the server in Lesson 6)
- Server Hostname: something memorable like
claworopenclaw - Server Label: same as hostname, or a short description like "OpenClaw VPS"
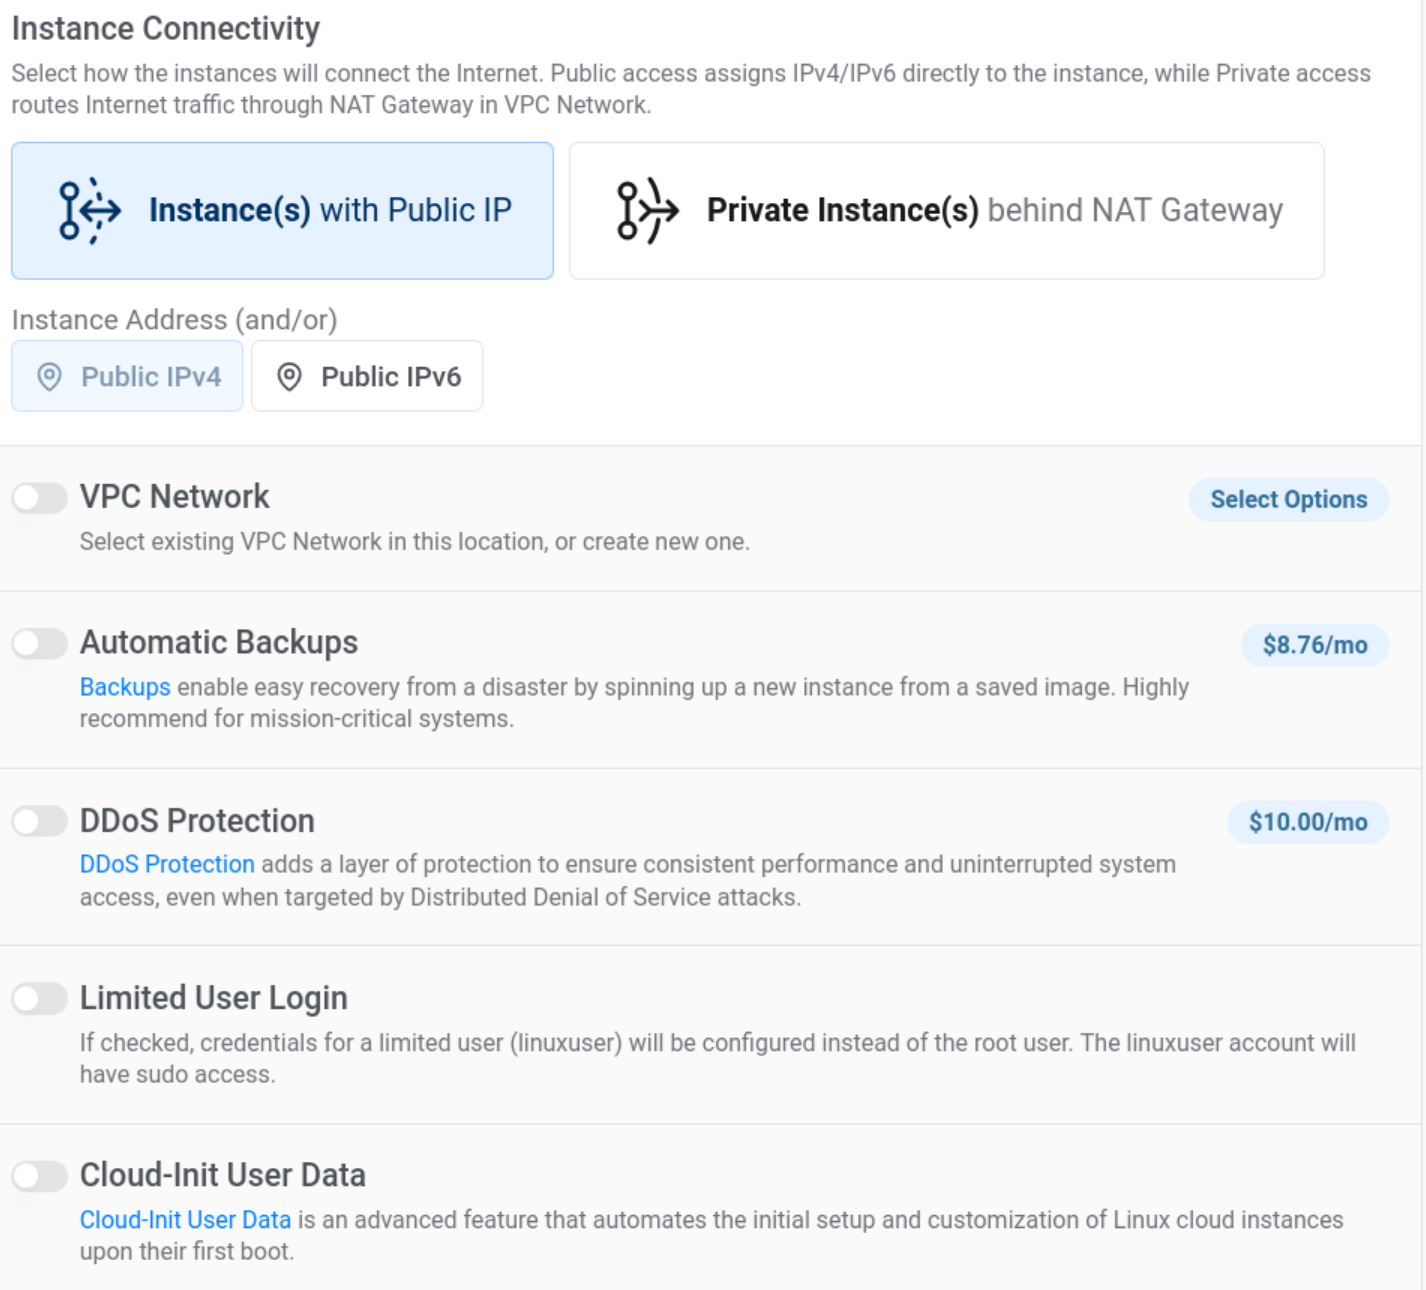
- Instance Connectivity settings:
- Instance(s) with Public IP — should already be selected
- Instance Address: enable both Public IPv4 and Public IPv6
- VPC Network: leave off
- Automatic Backups: enable ($8.76/mo — worth it for disaster recovery)
- DDoS Protection: leave off
- Limited User Login: leave off (we'll create our own user in Lesson 6)
- Cloud-Init User Data: leave off
- Click Deploy Now
Important: Save Your Credentials
After deployment, Vultr will show you:
- IP address (e.g.,
149.28.xxx.xxx) - Root password
Save both in Bitwarden immediately. Create a new entry called "Vultr VPS — [hostname]" and store the IP in the URL field and the root password in the password field.
Wait for Deployment
The server takes 1–2 minutes to provision. The status will change from "Installing" to "Running." Don't proceed to the next lesson until it shows Running.
When You're Done
- Vultr account created with Proton Mail + Privacy.com card
- Login saved in Bitwarden
- SSH key generated and added to Vultr
- VPS deployed (2 vCPU, 4 GB RAM or better)
- Auto Backups enabled
- Server IP address and root password saved in Bitwarden
- Server status shows "Running"
Monthly Cost: ~$33
$24 for the VPS + ~$9 for automatic backups.